

West Harbour Victorian Bathroom With A Timeless Makeover
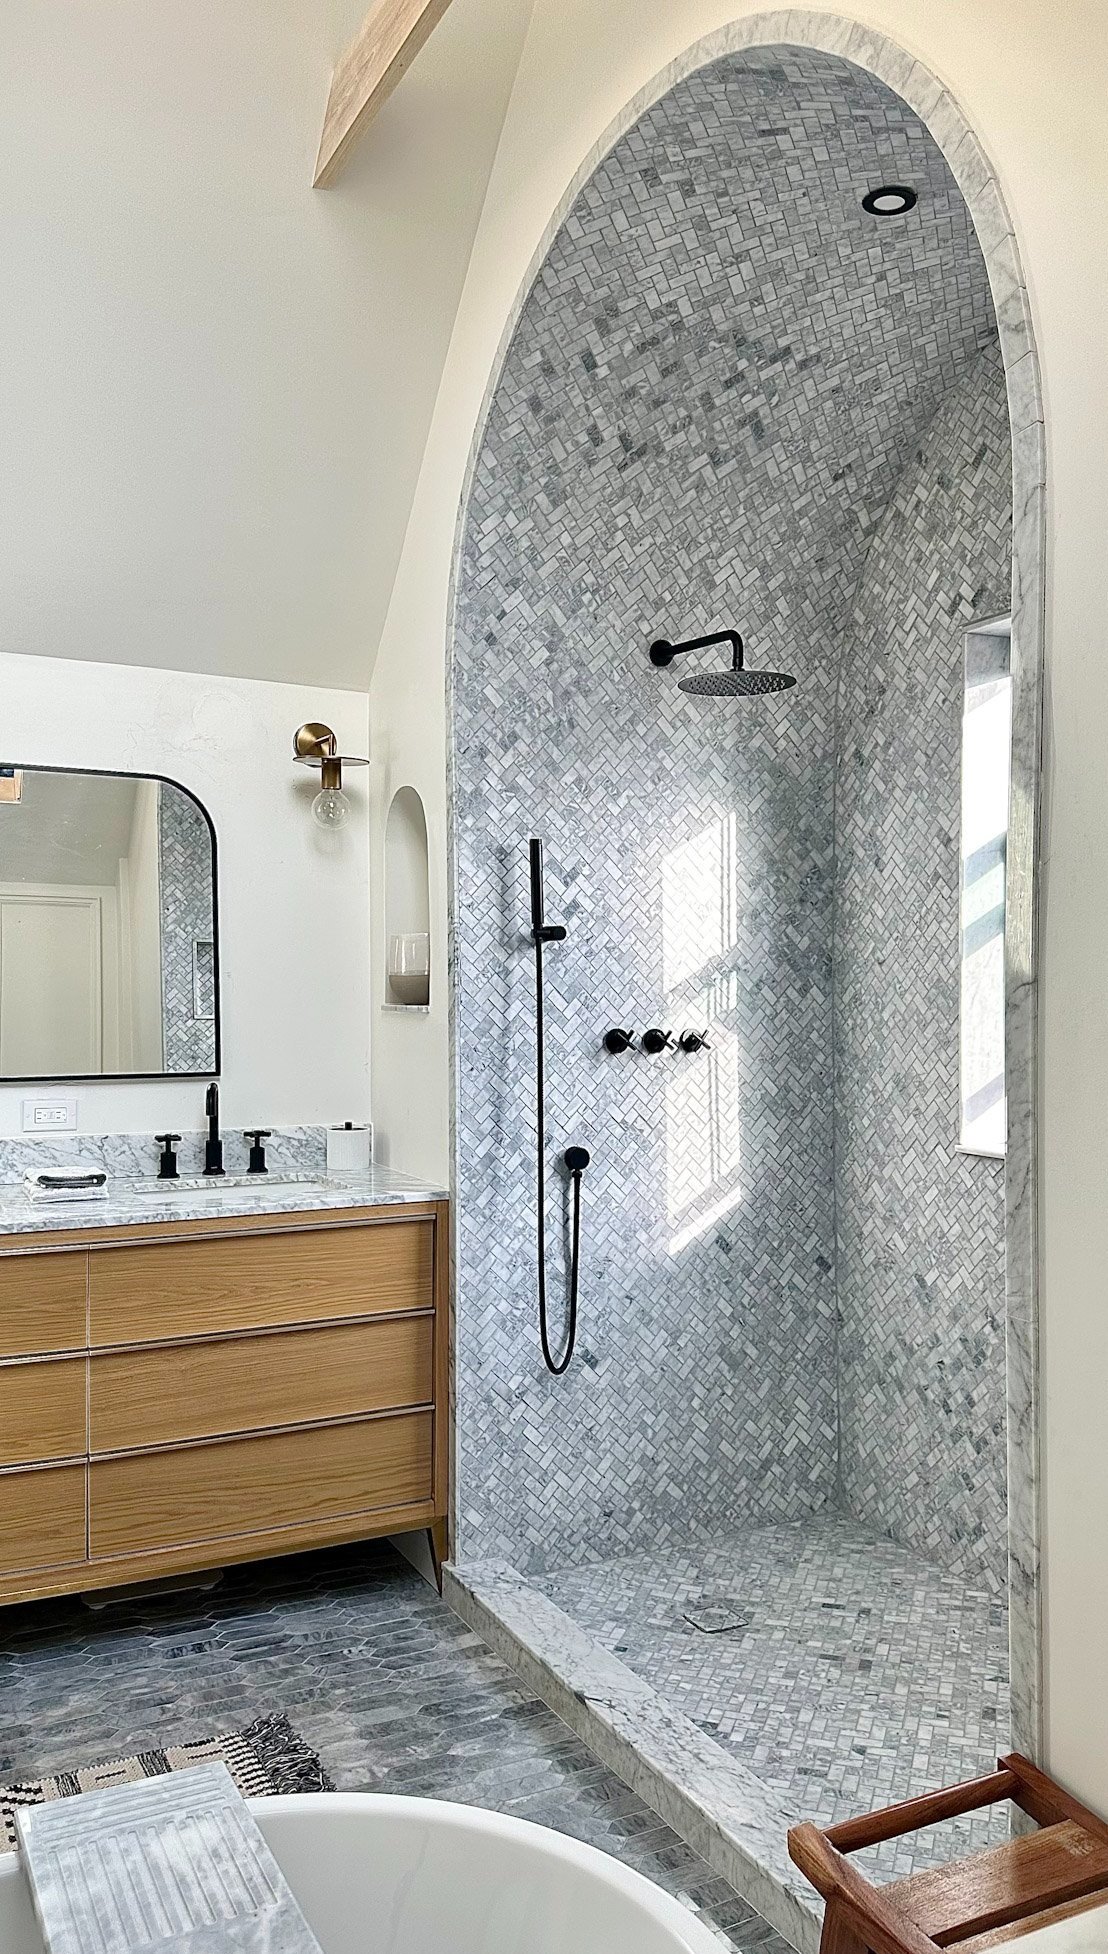
Principal bath at our Hamilton West Harbour Project


It All Started With The Gable Roof.
When designing this 3rd floor loft and converting it into a principal suite, the gable roof line was our jumping point.
Although this architectural feature is what adds character and uniqueness to the space, it does come with some drawbacks as well. Minimizing the effects of the shorter side walls was at the forefront of my design.
I first started designing the space how I always do - in my 3D modelling software, Revit. From the beginning I knew the Principal Bath would have to be at the back of the home for a few reason, one being for that of privacy. This is downtown Hamilton after all, so if windows are in the bathroom I’d prefer them face into the yard.
In terms of the placement of the principal bedroom, I also prefer to wake up to the eastern exposure and catch the sunrise, so the bedroom was best suited to be at the front of the home.
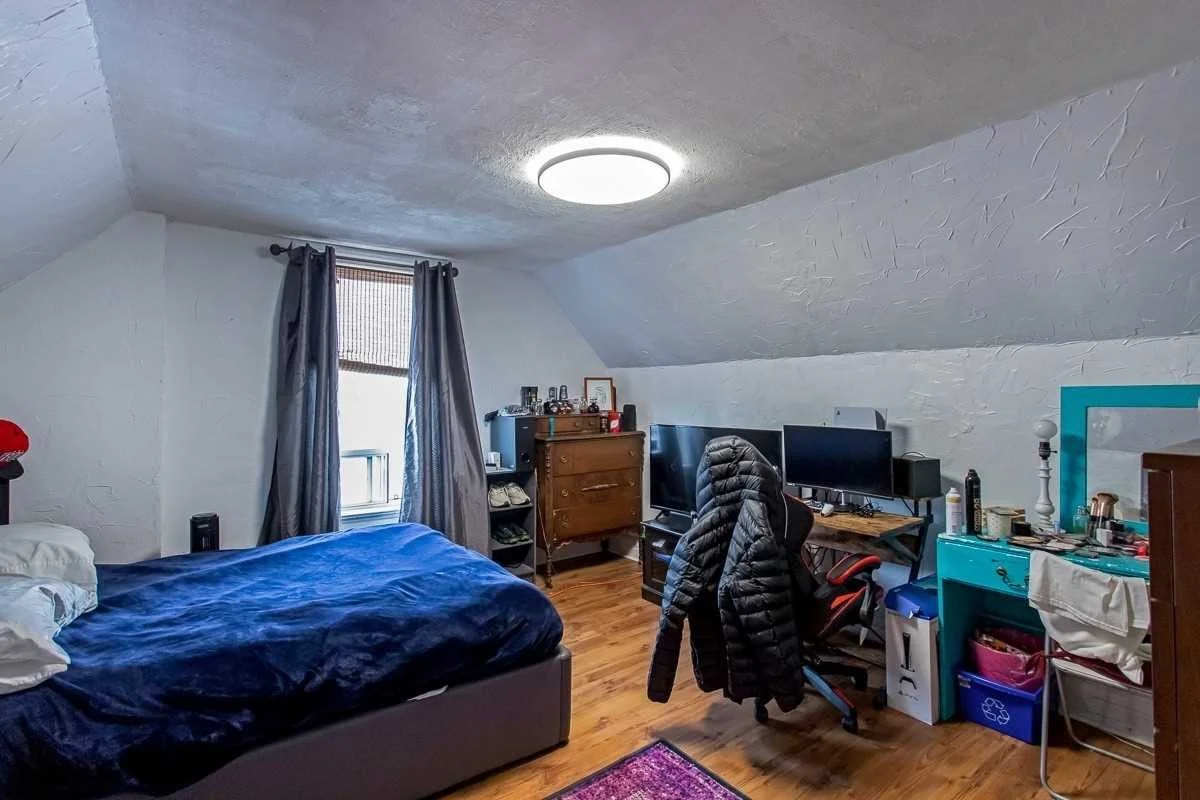
Before - Principal Bathroom
The Plans:
In the photo above is the before picture of the room. When I originally walked the space it felt rather claustrophobic. I knew this was not because of the area of the space itself, but was due to the amount of height above you. The collar ties dictated the ceiling height, making them only 7’. I knew the total width of the space and the slope of the roof line, so after some basic pythagorean theorem math, I had a good idea of just how high it was to the peak. Under all that lath & plaster and insulation, was tremendous volume to be revealed.

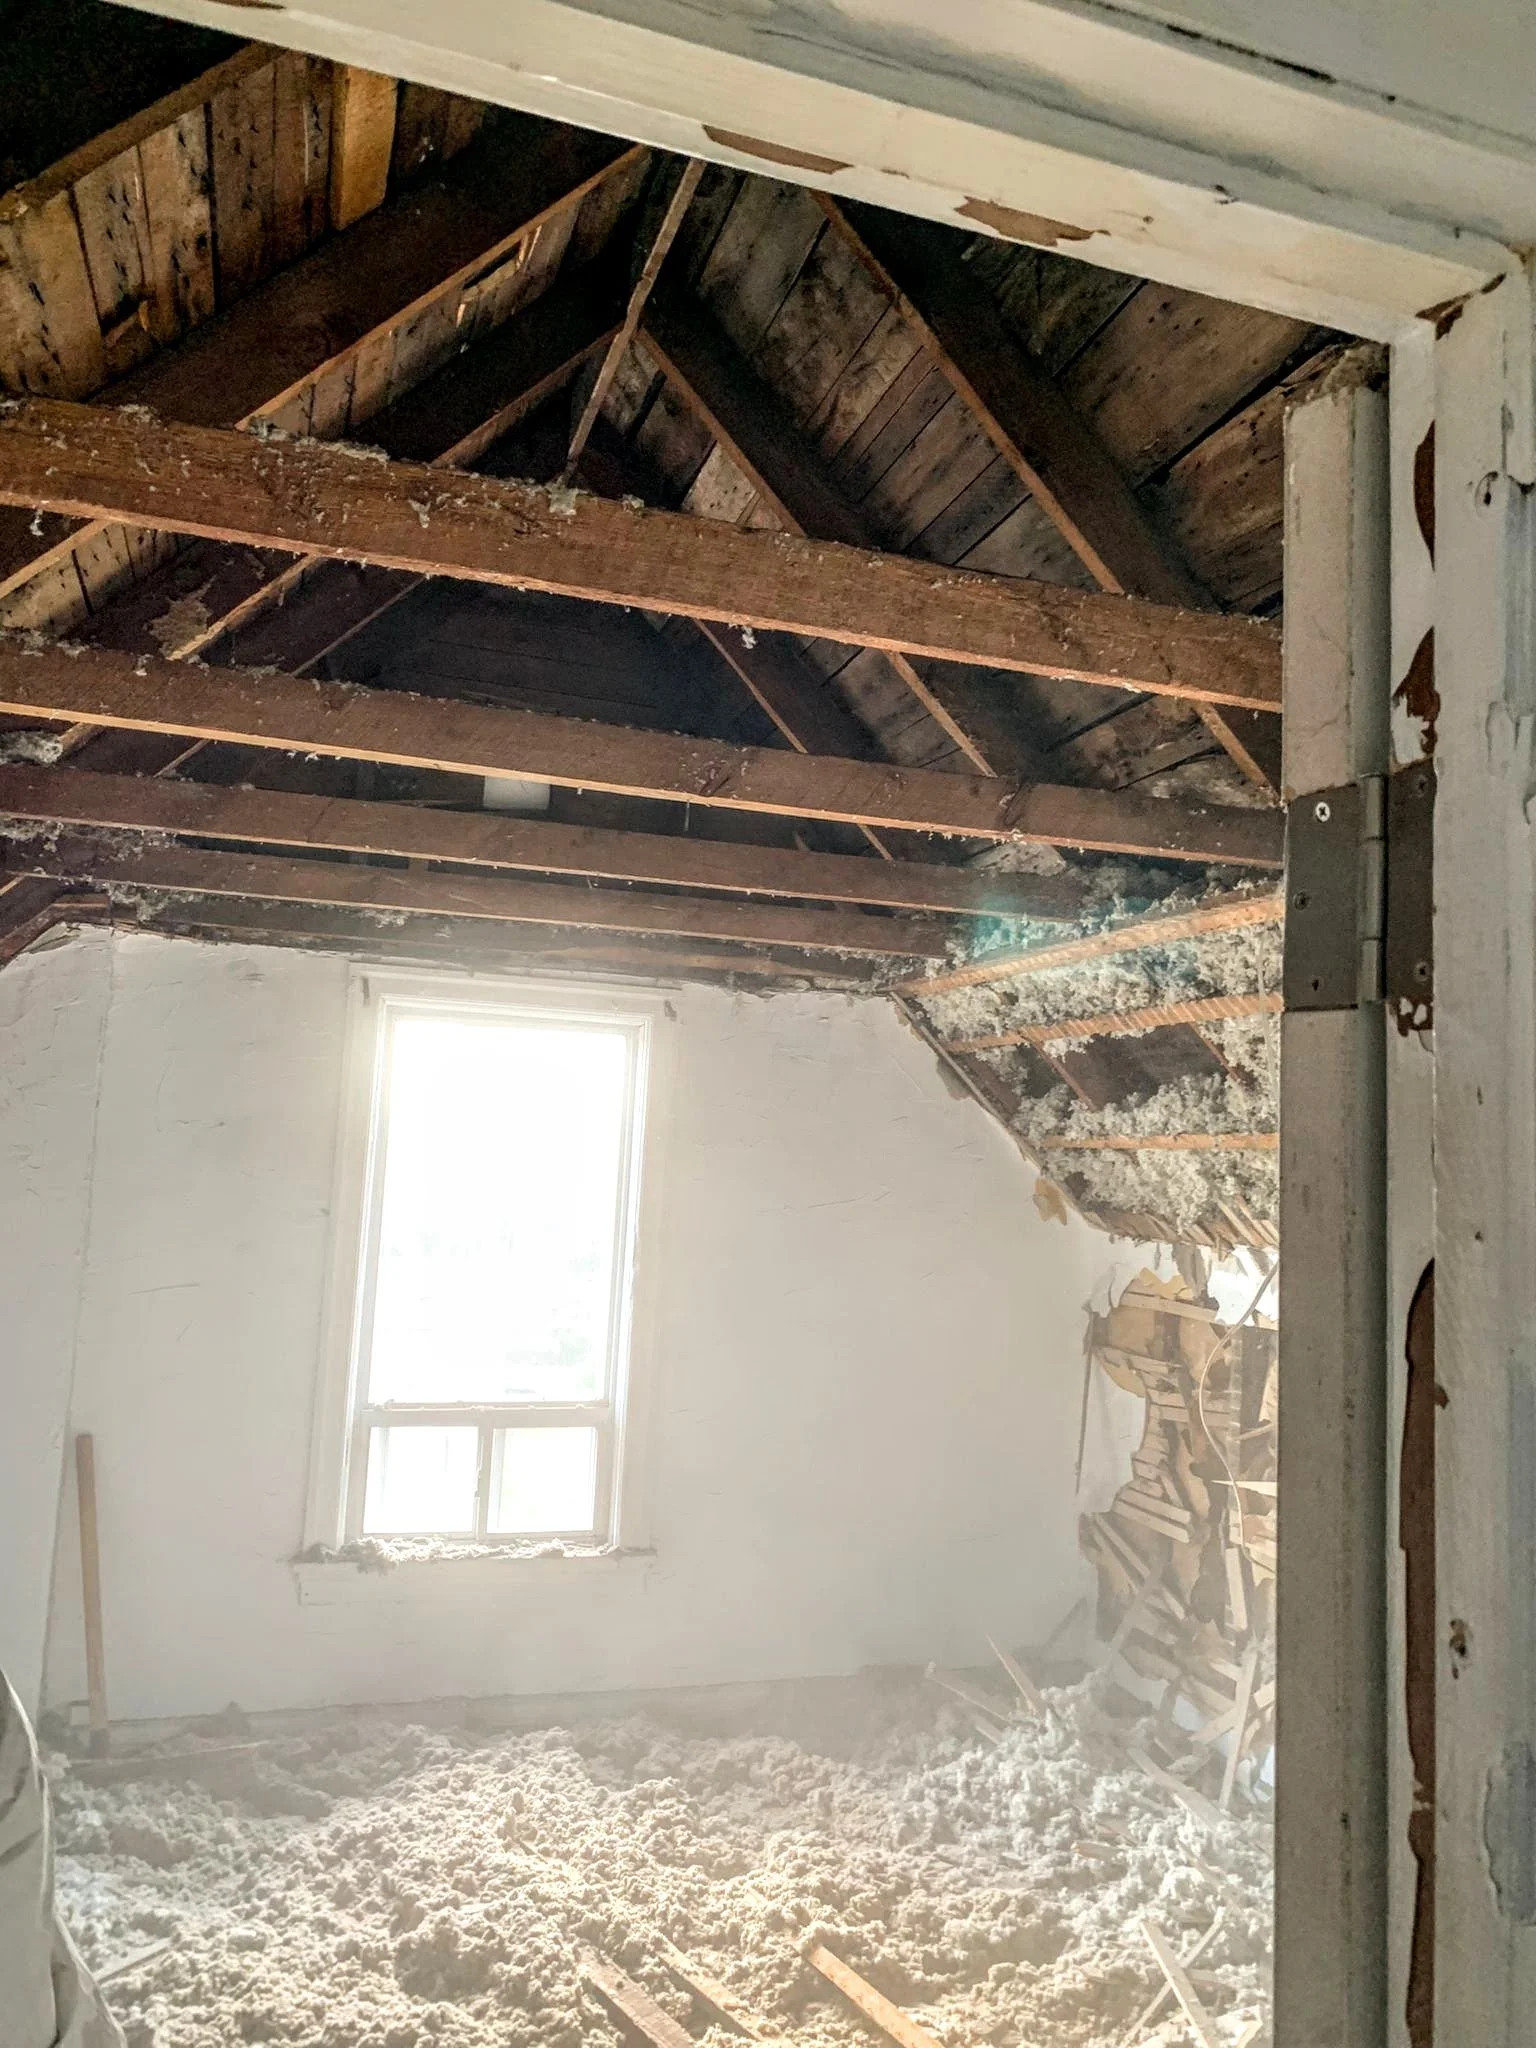
Look at that extra ceiling height!
My contractor husband and I gutted the entire space ourselves, something I do not recommend! Lol. We did everything ourselves (less the electrical, plumbing, HVAC etc.)
We were lucky though. In its raw framed state, the 3rd floor measures 32’ long x 24’ wide, with 12’ dreamy ceilings to the peak. With ceilings this high, I knew we had to maximize the verticality of the space.
Gutted - Looking to Principal Bedroom
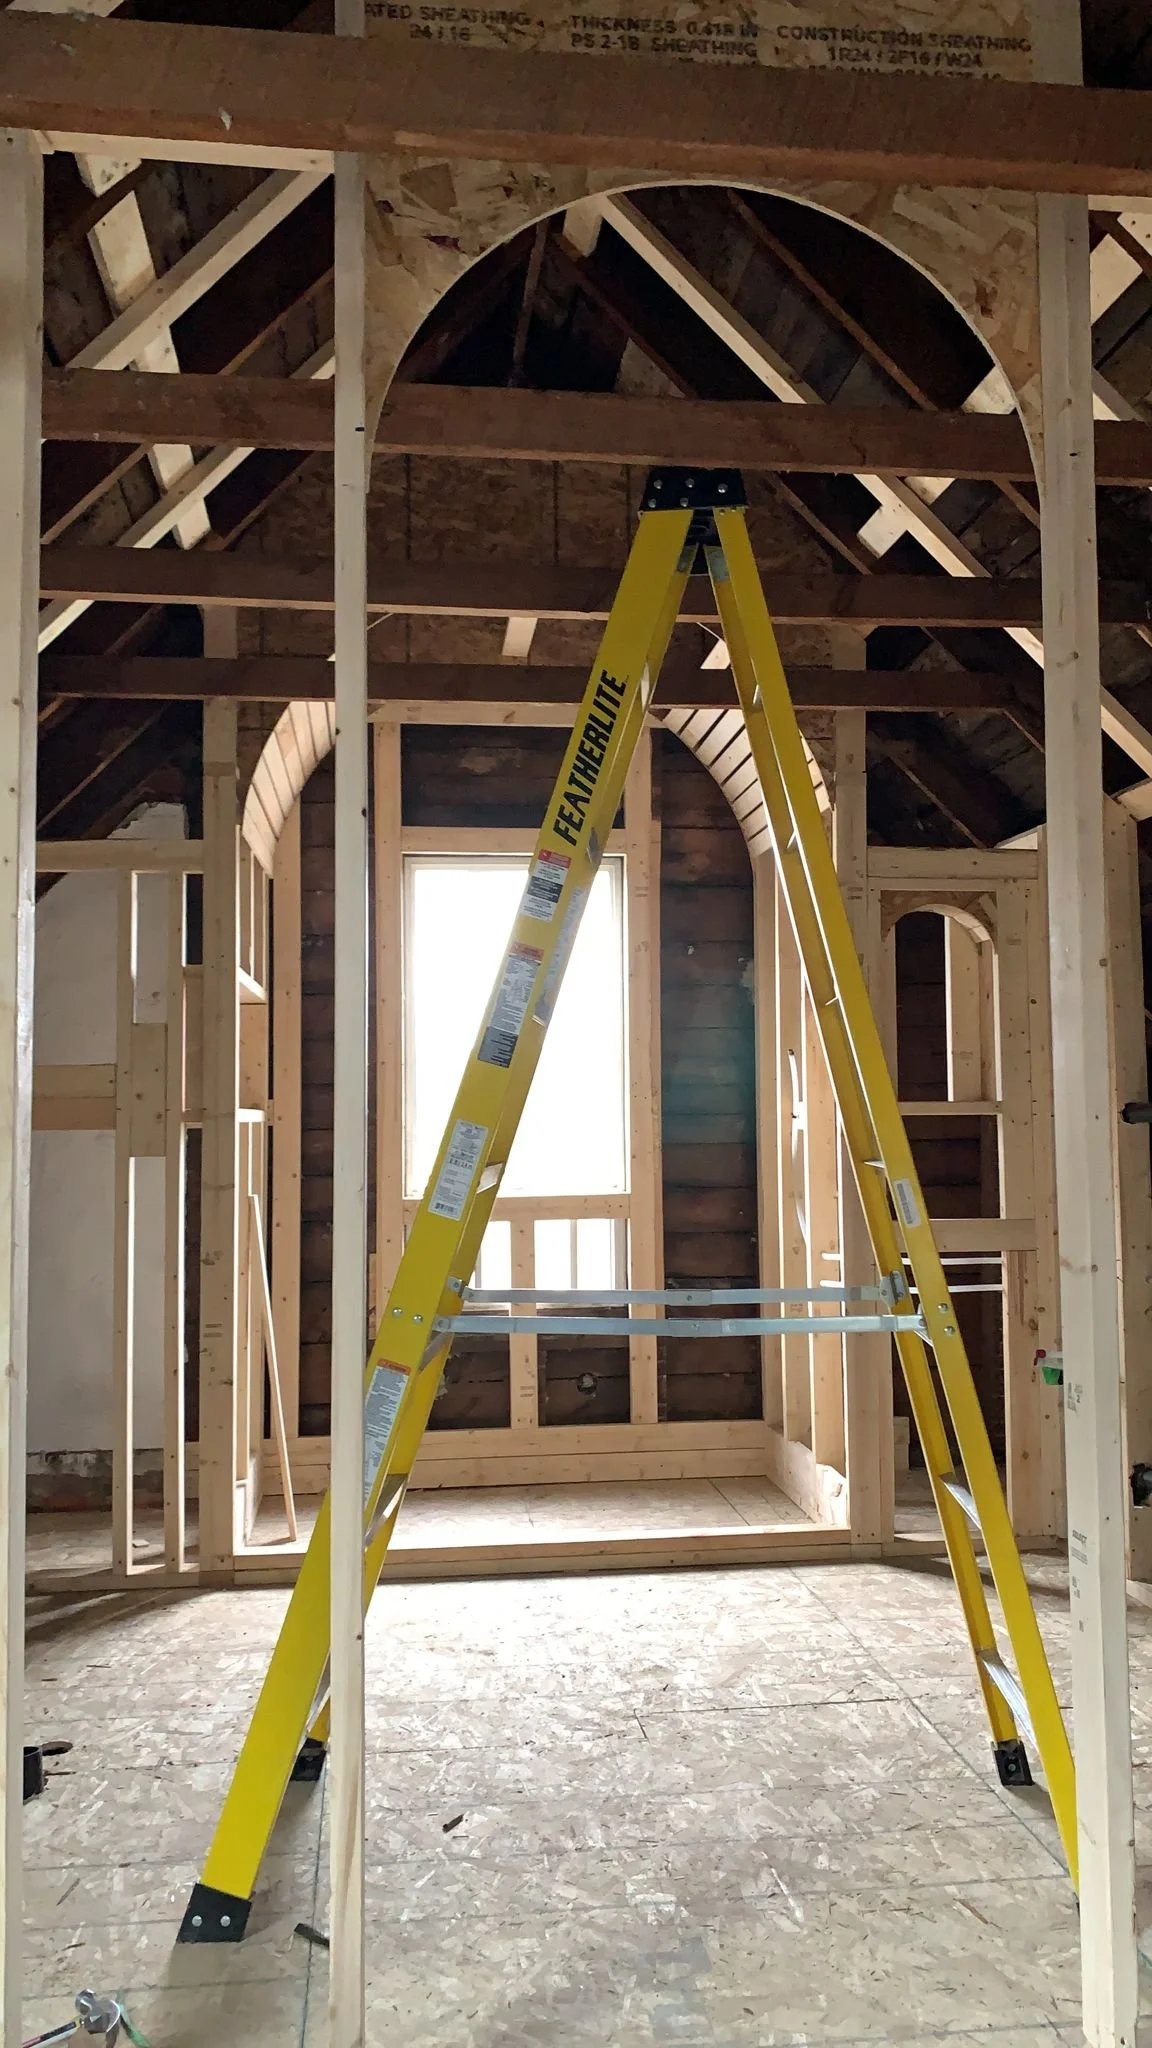
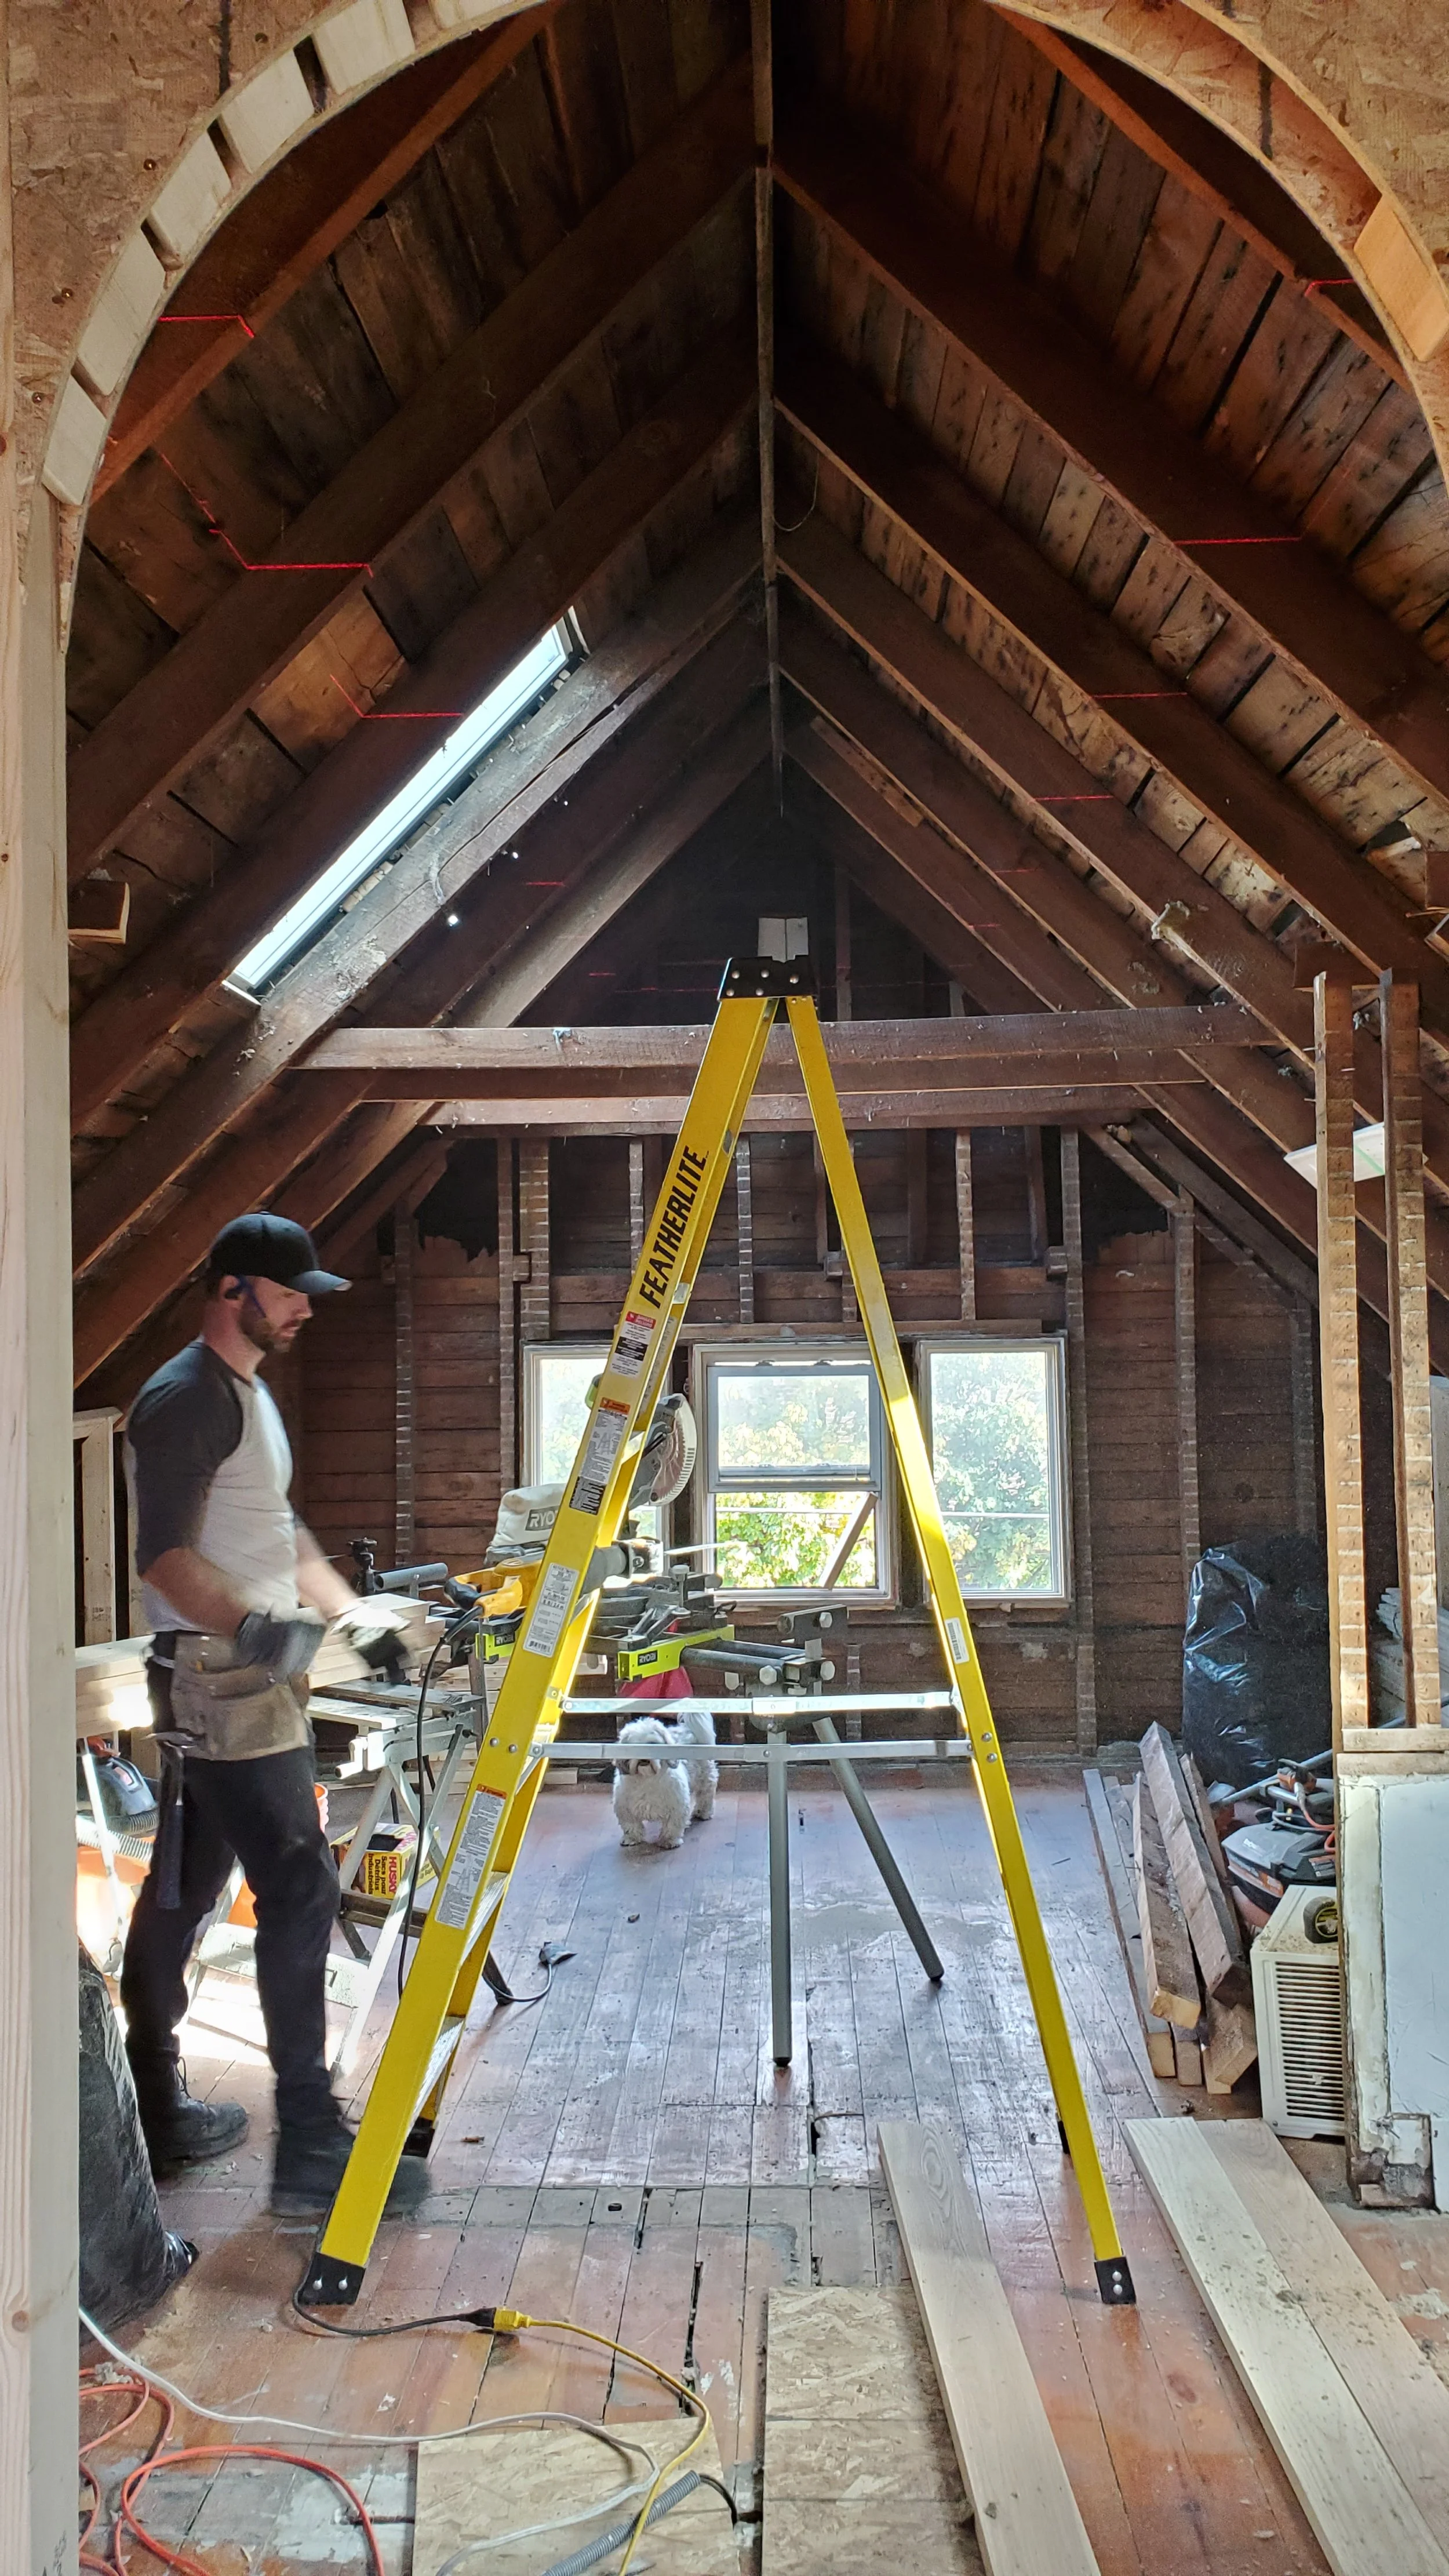
Framing Started - Looking to Principal Bath
After discovering that I’d be able to attain a 12.5’ ceiling height throughout the entire 3rd floor loft, I began to think “sight lines, sight lines, sight lines!” What would be the most aesthetically pleasing element to look at first when coming upstairs to your principal suite?
At first, I thought it should be a bath, and I thought this for some time. This first draft is pictured below.

First Draft - Tub centred, with vanity and shower on sloped wall
But again, we’re dealing with sloped and angled ceilings. Shouldn’t your most frequented space be the most jaw dropping experience? In other words: people use their shower more than they use their bathtub, so why place your shower on an angled wall if you don’t have to? So I opted to put the shower dead centre under the peak where I could maximize head height and have the most luxurious shower experience.

Final Design - Shower centred with tub and vanity on sloped wall
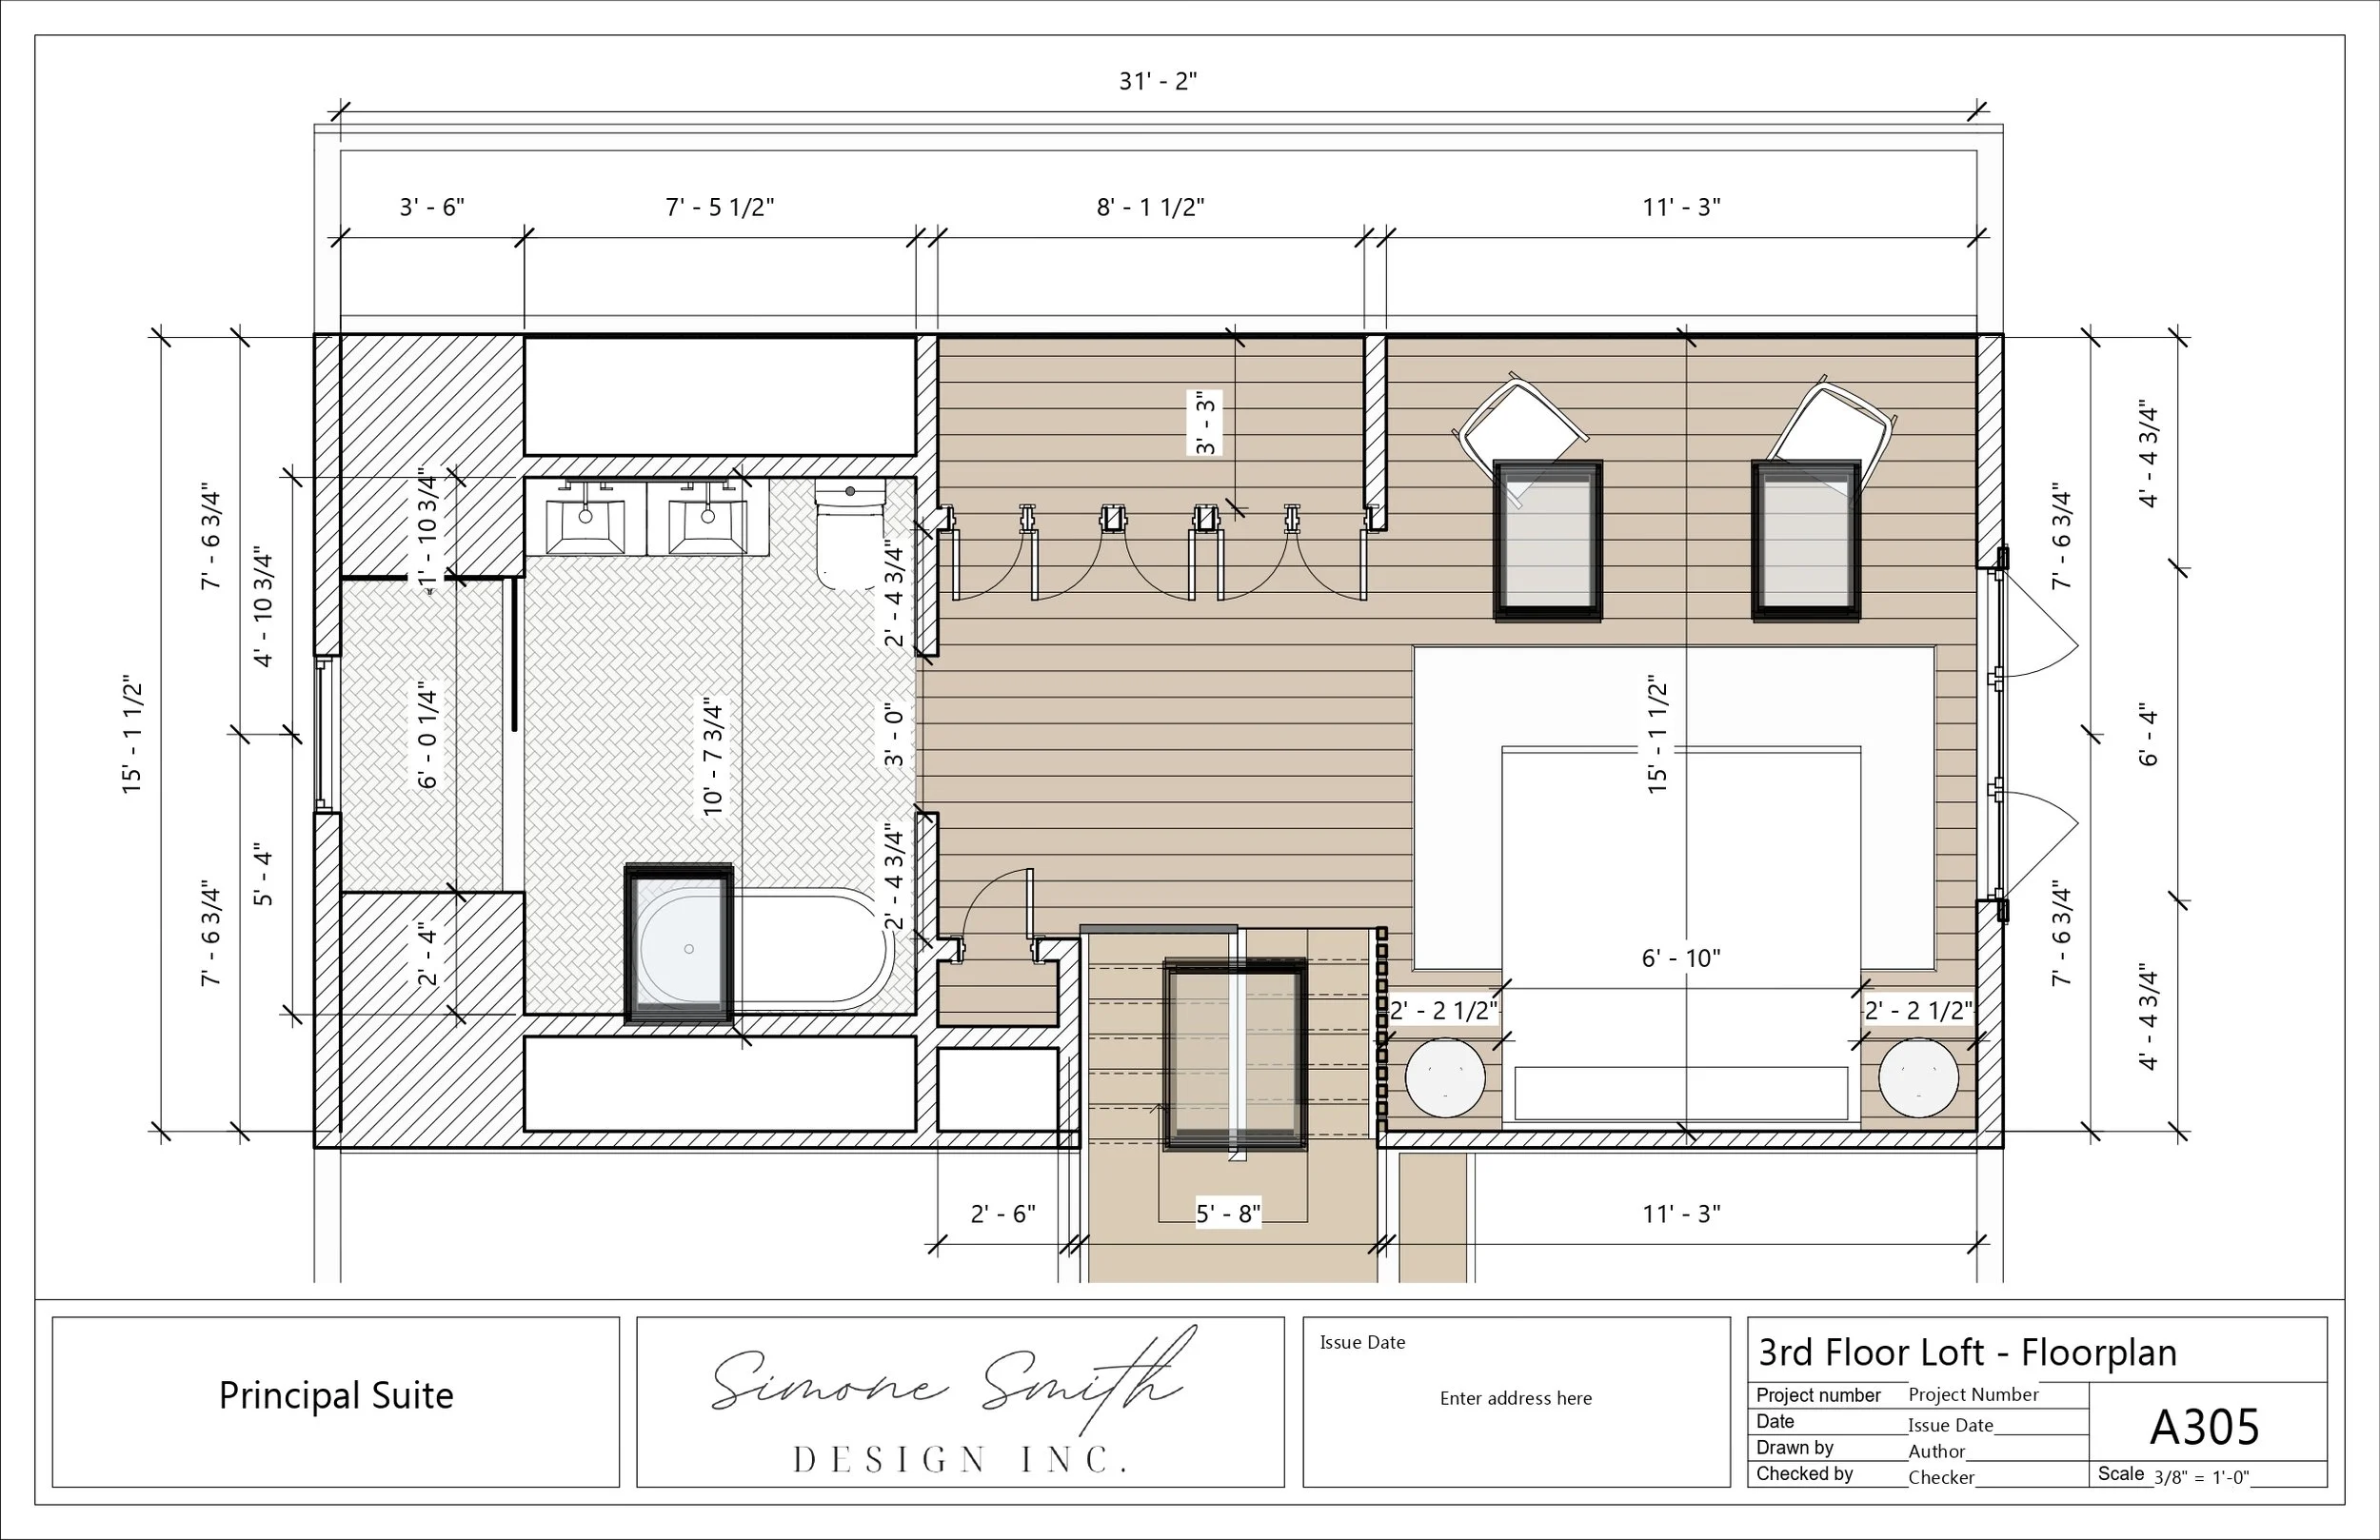
Final Design - Floor plan
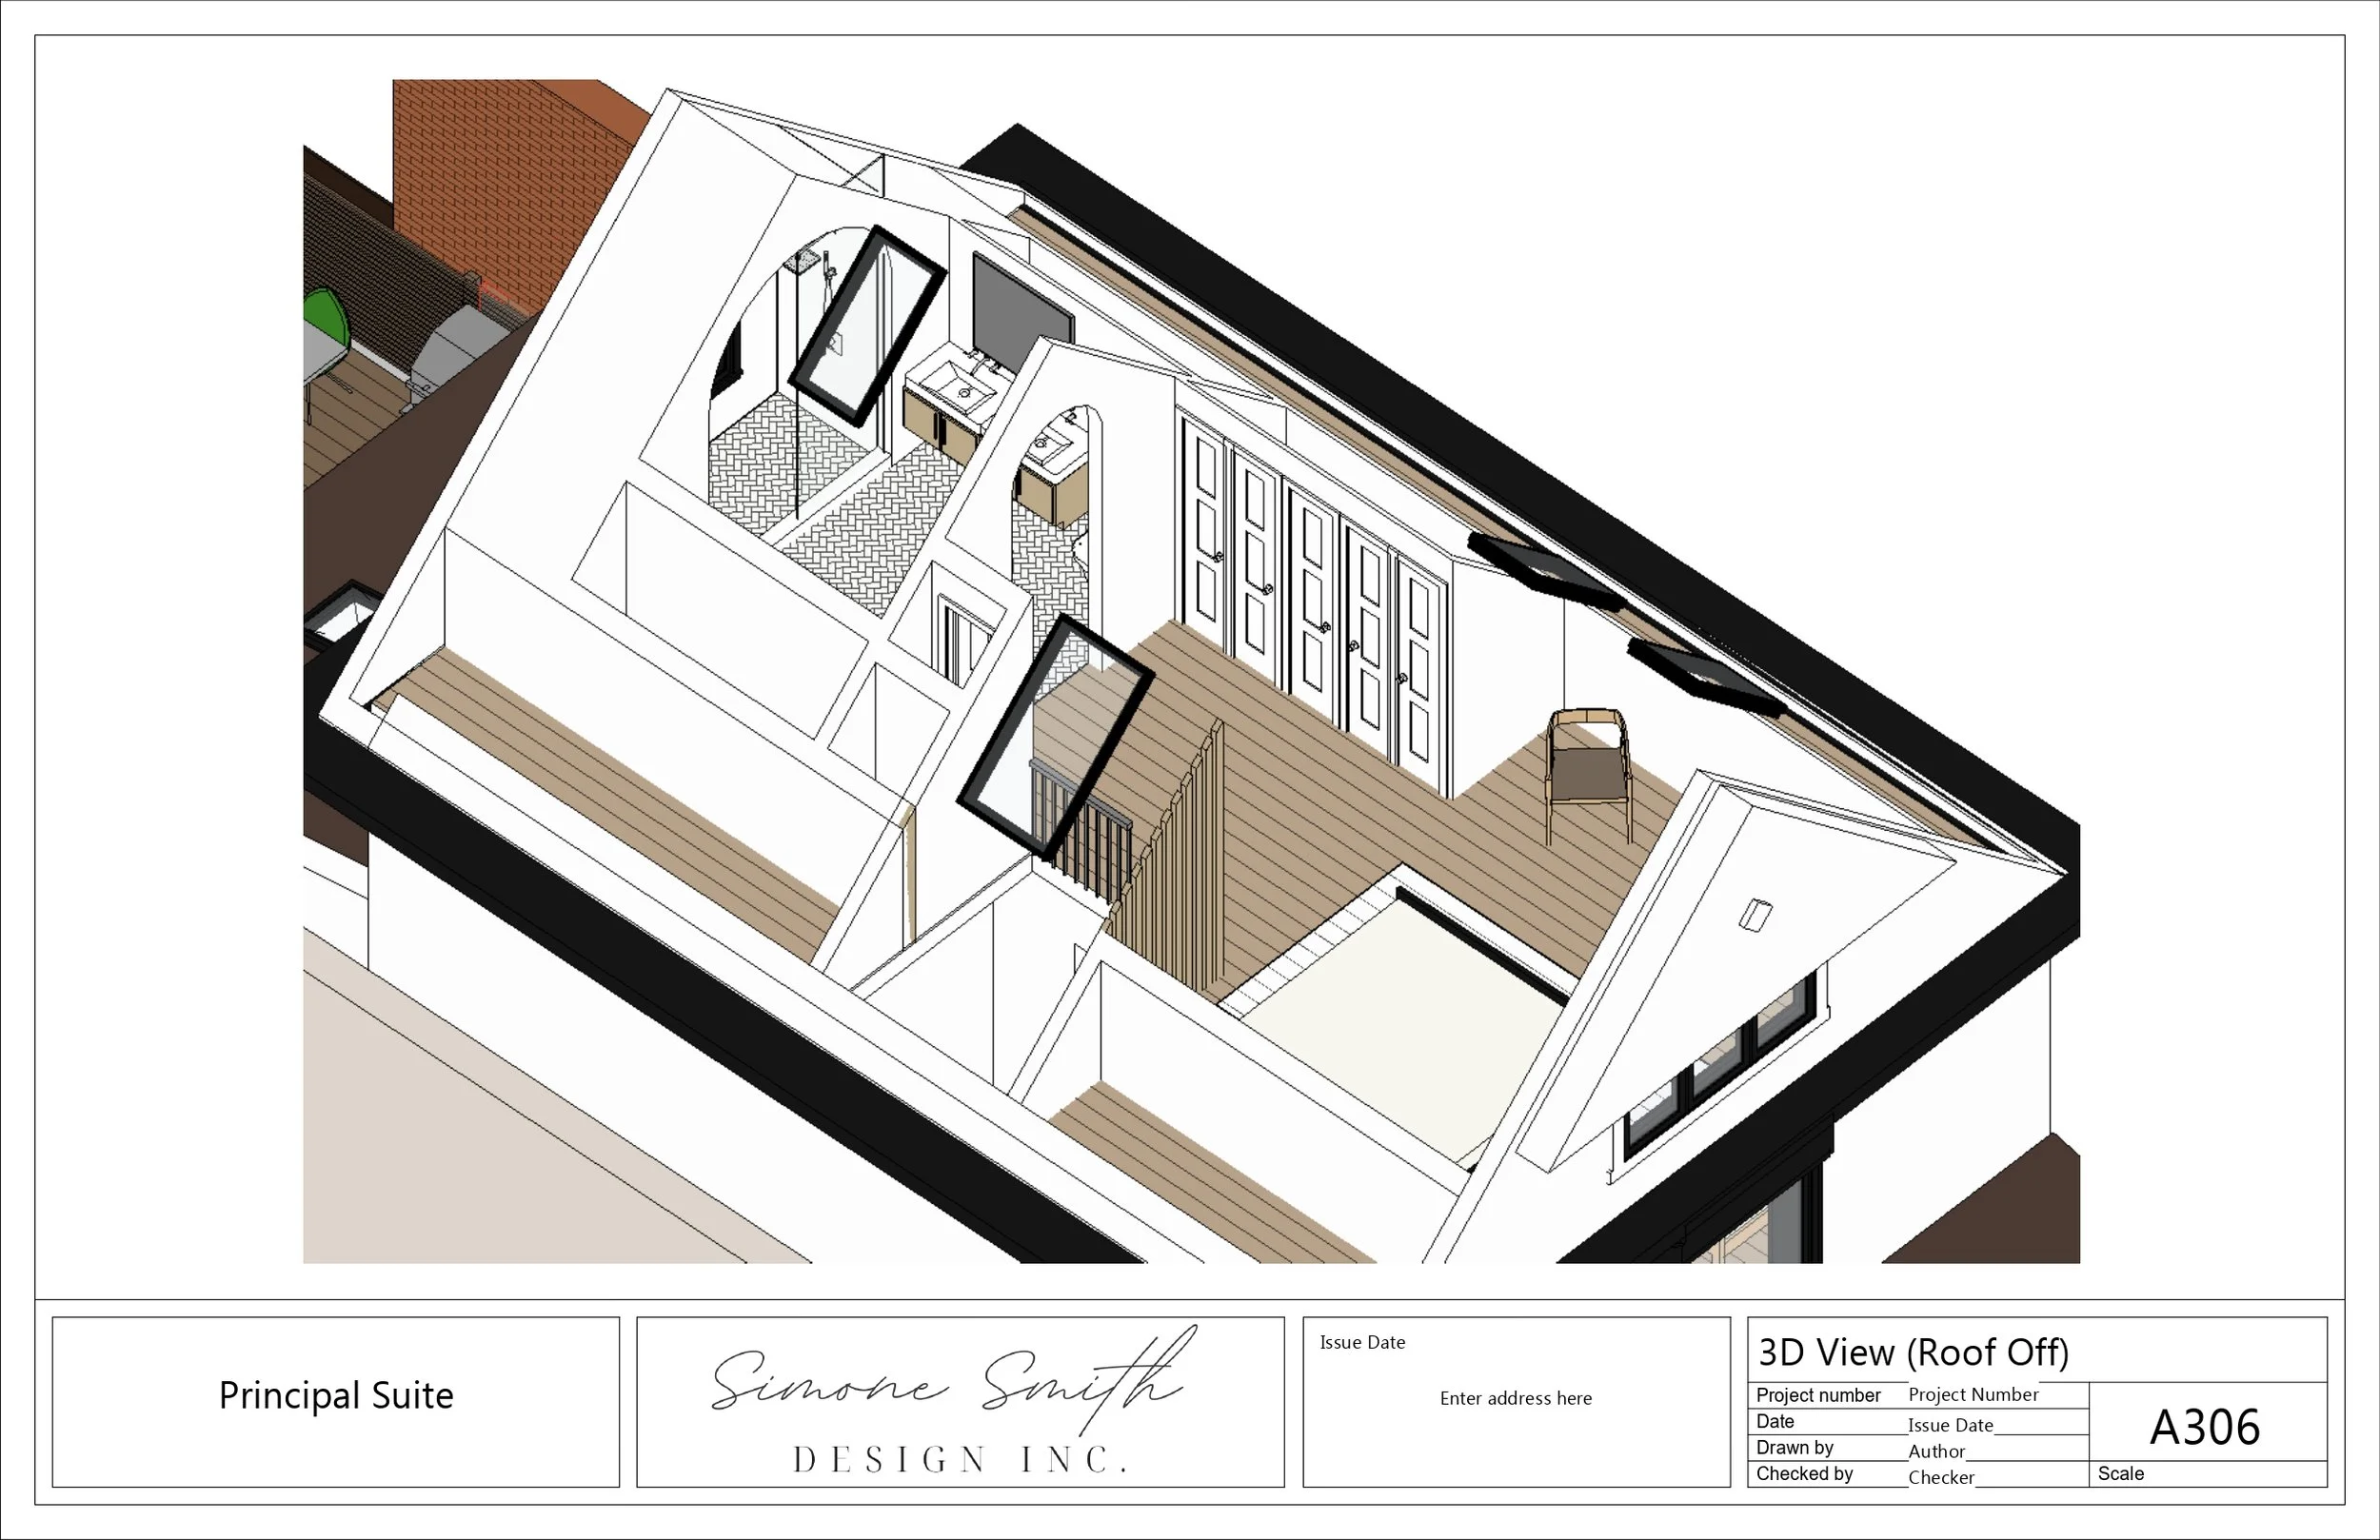
Final Design - 3D view
Me being me, I had to do more than the conventional, and I thought to myself “how to do I take it up a notch further?” So I decided I had to create an arch over the shower which (pinch me!) is oh so dreamy! The arch measures 10.5’ to the peak and really is the star of the entire 3rd floor. We decided to mirror the arch over the shower, with an archway into the bathroom, and then again with an arch niche beside the vanity.
With the location of the shower being dictated, it just made the most sense to allocate the vanity and tub to the perimeter walls where there would be obstacles in front of you that would eliminate one from ever getting directly up against the walls. In other words, the 30” x 69” tub in your way and the 22” x 60” vanity in your way, really makes the height of their respective walls rather less significant because you’re working feet away from them. Mind you, these 2 walls still measure 80” tall (the height of your average door) so you’d be fine regardless.
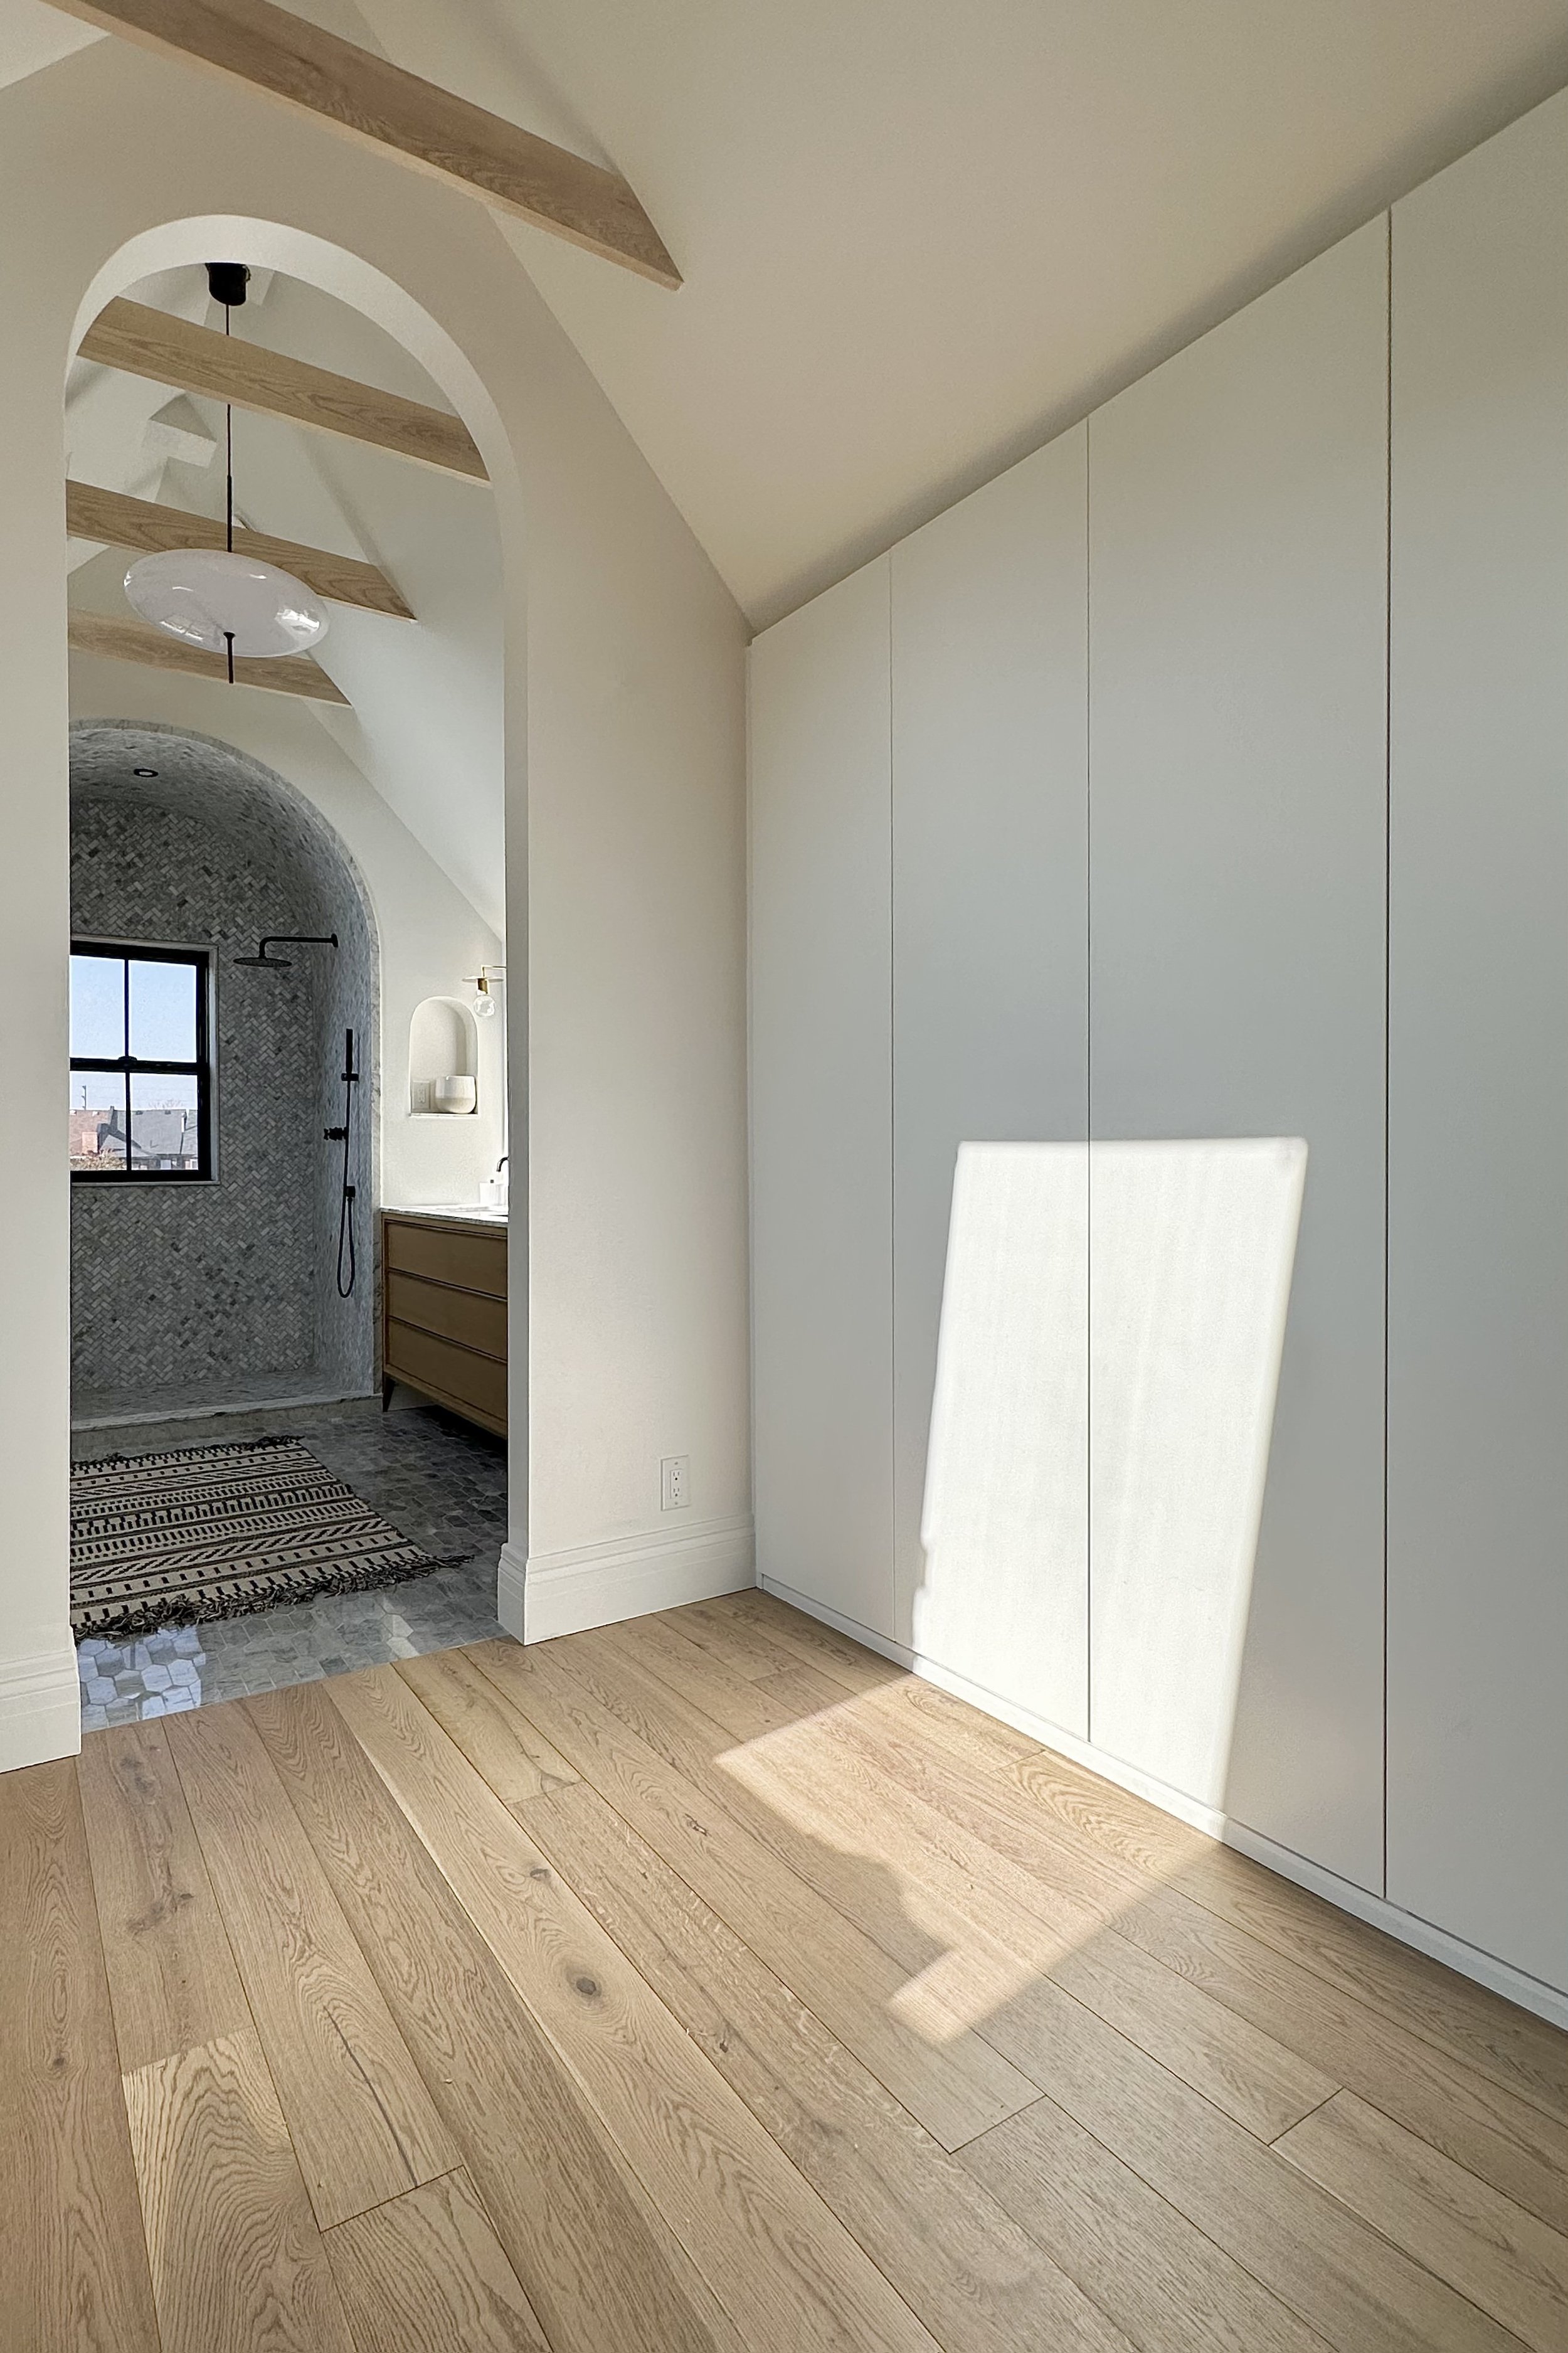
Principal Suite - Centre Hall Looking to Bath
Click here to see how we customized Ikea Pax Closets to contour to the angled ceilings.
The Finishes:
I’m a lover of natural stones. I don’t care if they require maintenance, I just don’t. I want to feel rich when I’m in a space, and natural stones embody just that.
We stayed classic and opted for carrara because you just can’t go wrong with it. What we did do however, was switch up the finishes/luster on the stones. See the pictures below for more detail.
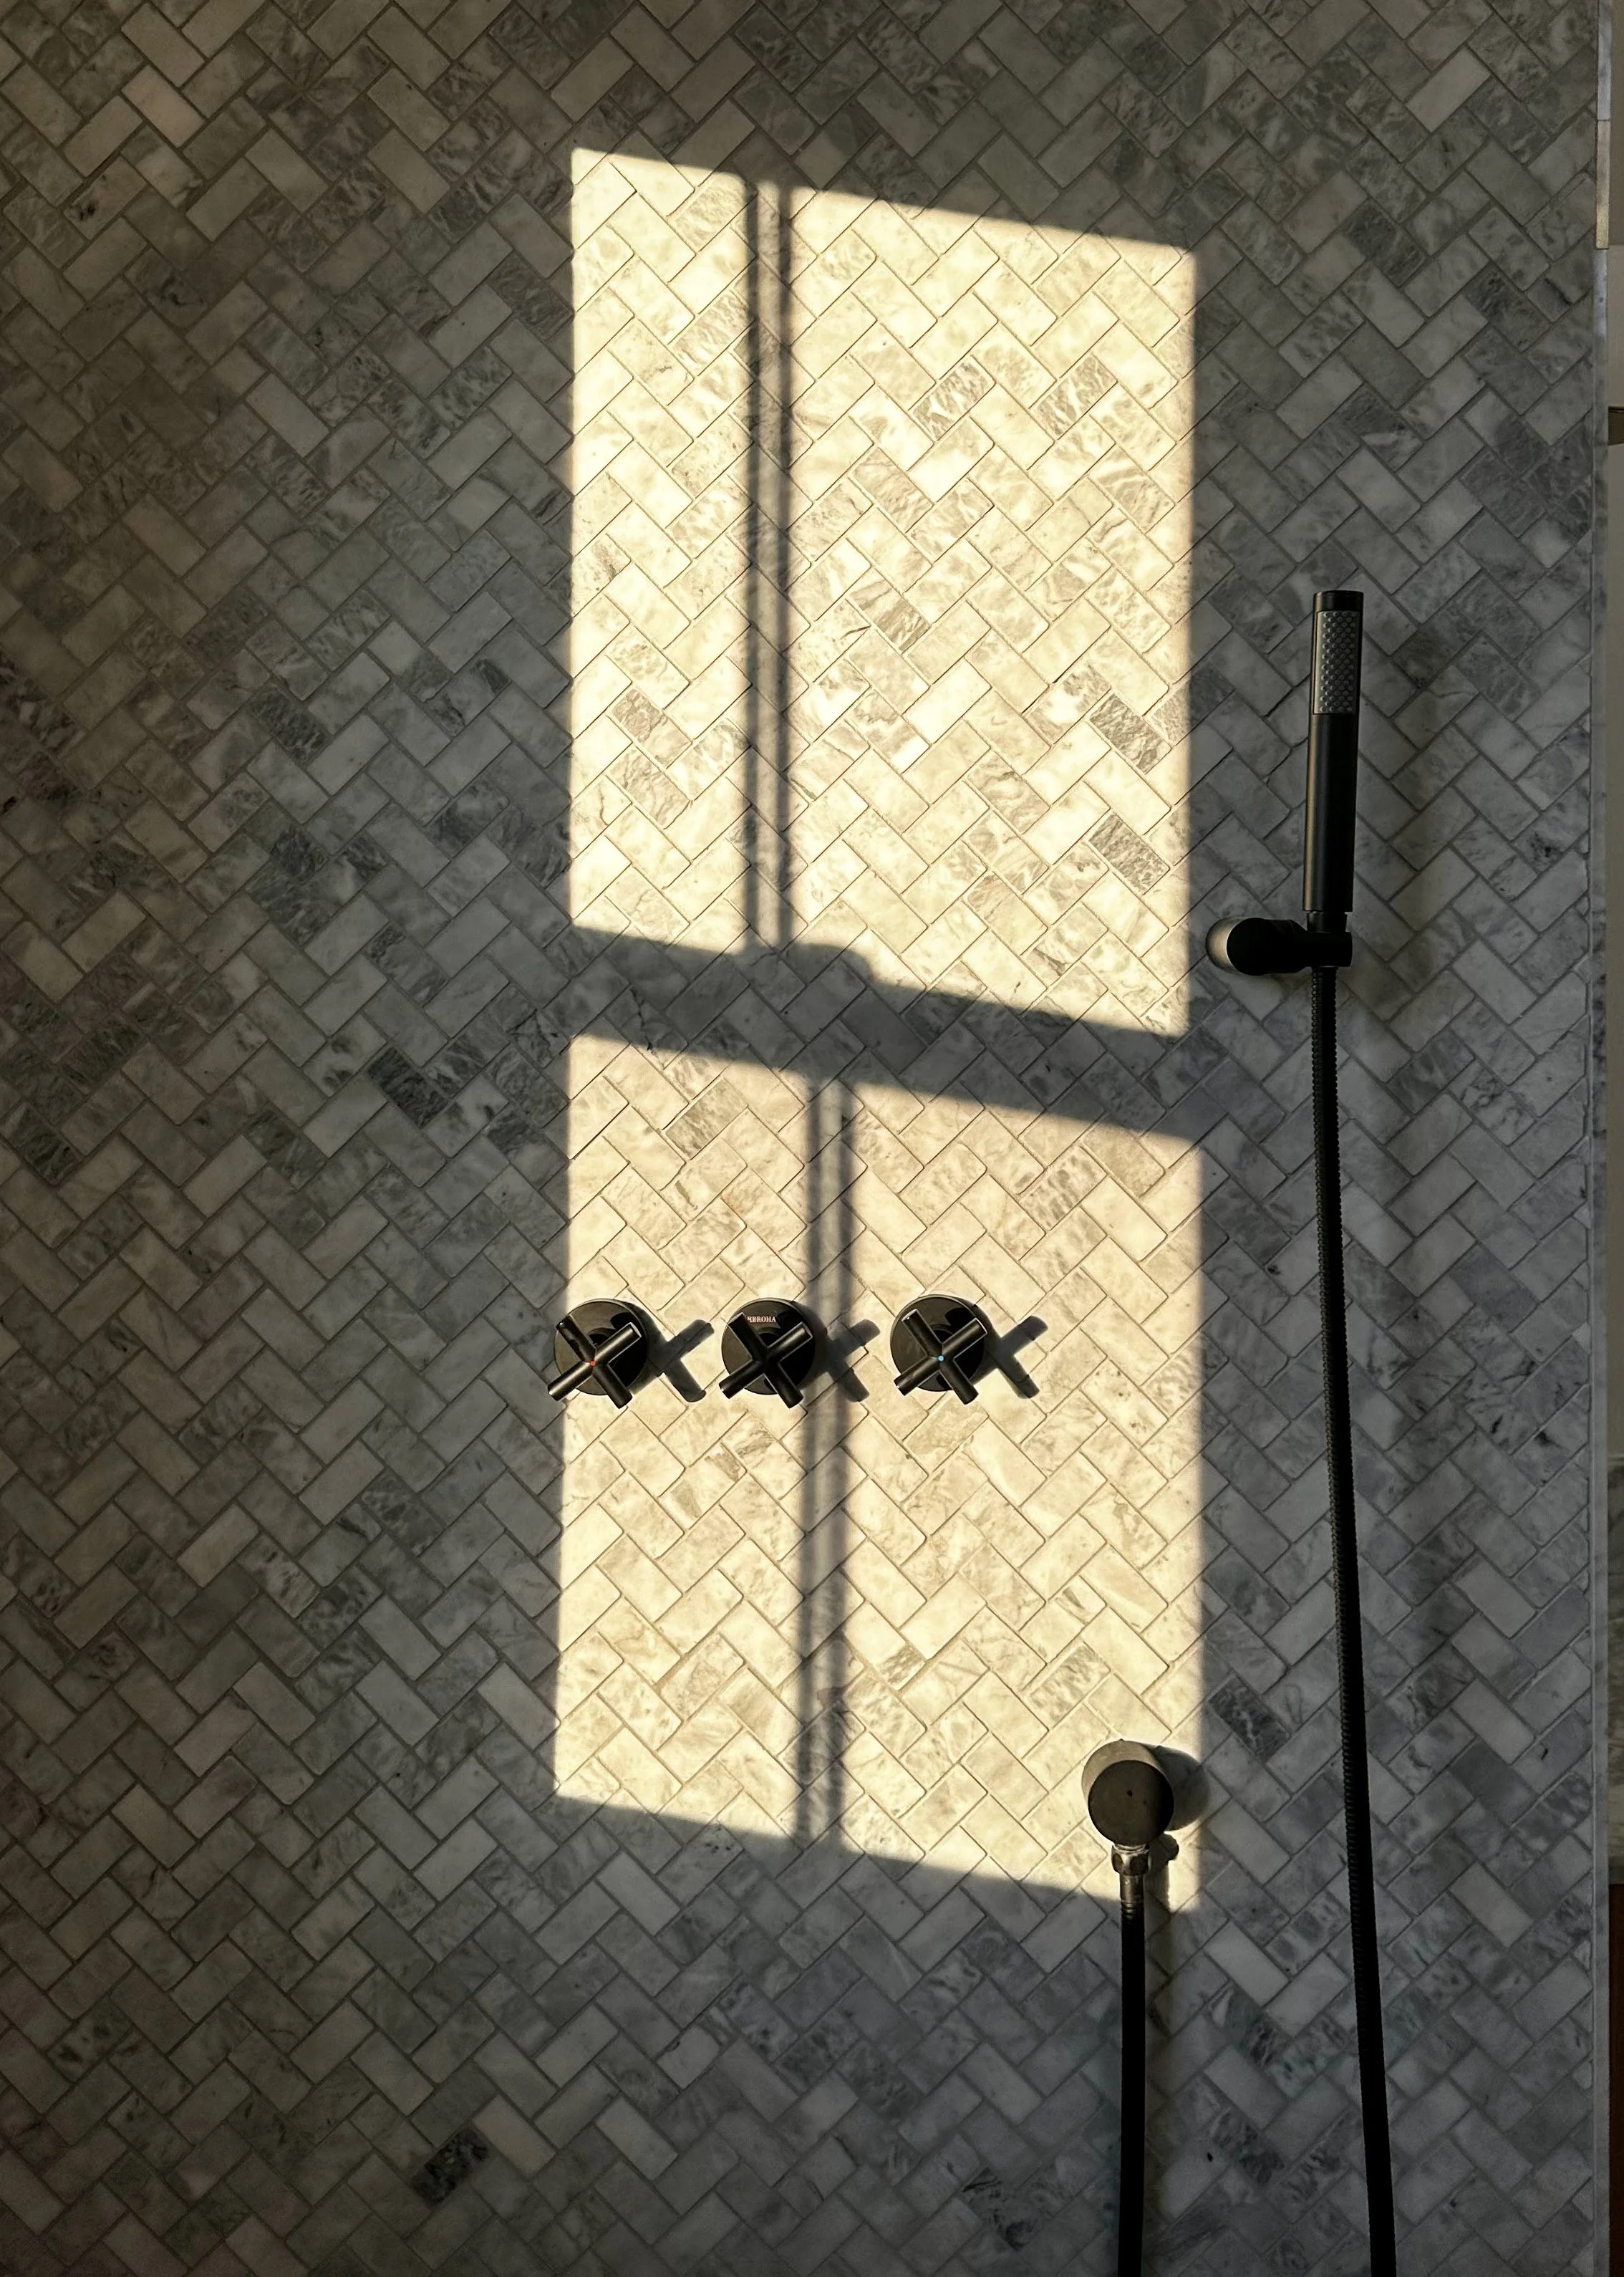
All the walls and floor in the shower are a honed carrara marble. Meanwhile the sills have a gloss finish. I thought it would be way too much for the shower to be all glossy carrara for 1 reason: this shower gets a ton of direct natural light. There’s both a west facing window in the shower itself, as well as a 44” x 22” south facing skylight almost directly above it. I didn’t want a blinding effect when the light hit the stone.
The shower sills, vanity and tub sill are all polished carrara. Polished is easier to wipe clean and maintain which is ideal for a surface that you tend to put more stuff on.
The collar ties are not white oak! I get asked that a lot. They are Ash. Click here to read more on them.
The floor in the bedroom is an engineered white oak, and the bathroom vanity is also white oak.
We’re still waiting on sconces to arrive that will go on the outside of the bathroom. And we’re also still waiting on a shower glass (I’m thinking a 50/50 divide all the way up to the peak) as well as custom mirror. They should arrive before Christmas, so be sure to check back for some updated photos!